Complete Arcane Lineage Boss Guide – How to Beat Them All
- By Ava
- May 04,2025
In Arcane Lineage, bosses range from straightforward encounters that even beginners can tackle solo to formidable challenges requiring coordinated teams. Each boss presents unique mechanics and demands strategic planning and patience to conquer. Successfully defeating these bosses grants access to some of the game's most coveted loot and items. Dive into our comprehensive Arcane Lineage Boss guide to equip yourself for these epic battles.
Arcane Lineage Boss List
King Slime
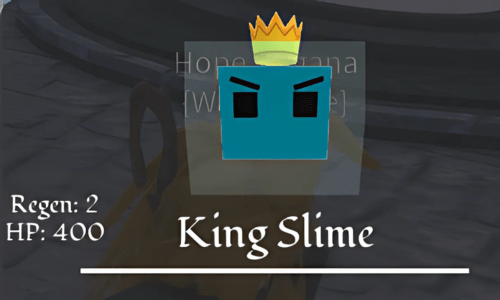
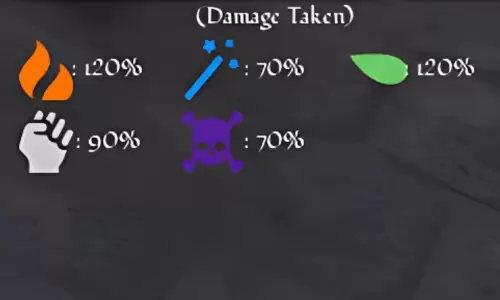
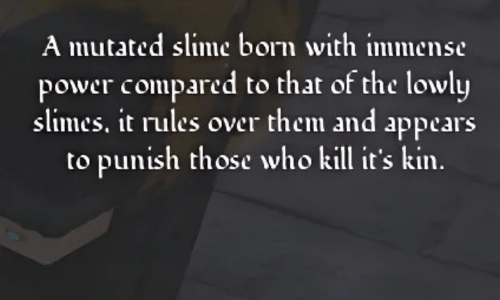
King Slime is considered a mini-boss due to its lesser threat compared to other bosses. However, it remains a challenge for low-level players. Notably, defeating King Slime does not yield soul points.
King Slime Location
King Slime spawns after 100 Slimes are defeated on the server. It appears near the city closest to the last slain slime, with a notification on the Quest Board signaling its arrival. The quest involves two steps:
- Find the King Slime
- Kill the King Slime
This quest has a 30-minute global cooldown on the server.
King Slime Fighting Strategy
With a health pool of 400 HP (600 if Corrupted), King Slime has the lowest health among bosses. It primarily summons additional Slimes that can overwhelm your party if not managed. King Slime also employs various AOE poison attacks, necessitating potions and cleansing abilities. Focus on eliminating the summoned Slimes first to swiftly defeat King Slime, whose AOE attacks only inflict poison without direct damage.
| Attacks | Energy Cost | Effect |
|---|---|---|
| Slime Creation | 1 | Summons a Slime to fight for King Slime. |
| Crush | 0 | King Slime lunges forward, attacking a party member. |
| Poison Eruption | 2 | King Slime throws out a burst of Acid, poisoning your party. This attack cannot be dodged or blocked. |
| Scalding Spray | 3 | King Slime erupts with boiling hot liquid, poisoning your party. This attack cannot be dodged. |
King Slime Drops and Rewards
Upon defeating King Slime, you may receive:
- Random Tier 1 Equipment
- Slime Buckler
- Gelat Ring
Completing the King Slime event via the Quest Board can yield:
- Ferrus Skin Potion
- Small Health Potion
- Essence
- Gold
Yar’thul, the Blazing Dragon
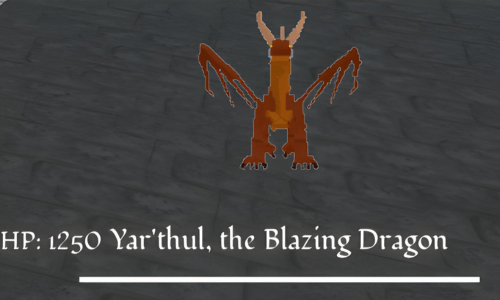
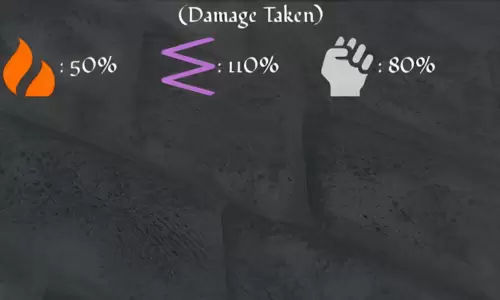
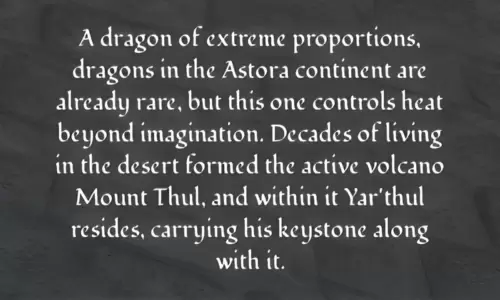
Yar’thul is a fire-type boss, utilizing Fire and Inferno-based attacks to inflict damage. Its attacks apply Inferno and Burning effects, making preparation crucial. Yar’thul is resistant to fire and physical damage but weak to Hex damage.
Yar’thul Location
To confront Yar’thul, journey deep into the Desert to Mount Thul, an active volcano. Navigate the dark corridors to reach the Blazing Dragon.
Yar’thul Fighting Strategy
With 1200 HP (1800 if Corrupted), Yar’thul compensates for its lower health with high damage output. Its attacks primarily inflict Inferno and Burning effects, turning the fight into a race against time. Below 50% health, Yar’thul enters a second phase, summoning meteors that stun and apply healing reduction. Prioritize quick damage, especially with the Dragon Ring and Pristine Accessories. The Corrupted version gains lifesteal.
| Attacks | Energy Cost | Effect |
|---|---|---|
| Inferno | 0 | Automatically applies Inferno status effect at battle start. Cannot be dodged or blocked. |
| Fire Claw | 0 | Yar’thul slashes with fire-imbued claws, dealing light damage. |
| Magma Pillar | 2 | Yar’thul creates a magma pillar, damaging and applying Inferno and Burn stacks for 3 turns. |
| Blaze Core | 3 | Yar’thul heals based on consumed Inferno stacks. |
| Blaze Eruption | 2 | Yar’thul slams the ground, damaging burning targets and applying scaling Inferno and Burning stacks. |
| Magma Beam | 4 | Yar’thul charges a devastating fire beam for 1 turn, firing massive damage on the next turn. Cannot be dodged or blocked. |
| Hellfire | 1 | Yar’thul sends out a fire wave, applying 9 stacks of Burning. Cannot be dodged or blocked. |
| Armageddon | 6 | Below 50% health, Yar’thul may summon a meteor, dealing massive damage and applying healing reduction. Can be used multiple times. Cannot be dodged or blocked. |
Yar’thul Drops and Rewards
Defeating Yar’thul guarantees:
- Absolute Radiance
- Permafrost Curse
- Wild Impulse
- Heavenly Prayer
- Breath of Fungyir
- Narhana’s Sigil
- Reality Watch
- Shifting Hourglass
- Ring of the Dragon
- The Void Key (if Corrupted)
Possible drops include:
- Dragontooth Blade
- Dragonbone Gauntlets
- Dragonbone Spear
- Dragonflame Shield
- Memory Fragment
- Soul Dust
- Phoenix Tear
- Resplendant Essence
- Lineage Shard
- Skyward Totem
Thorian, the Rotten
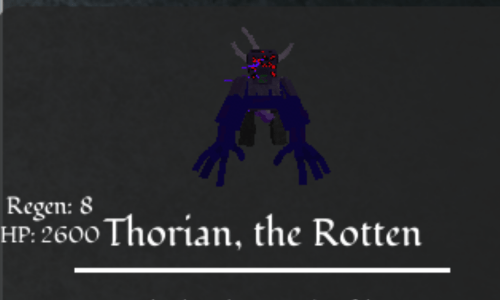
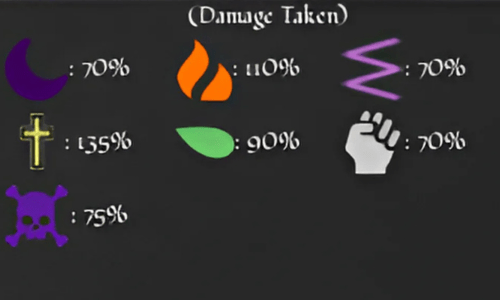
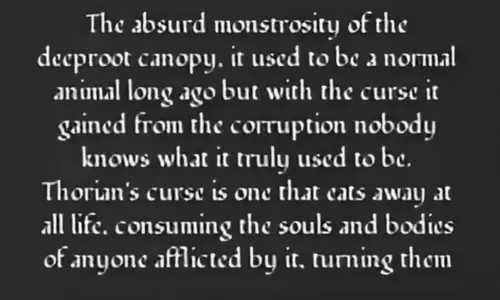
Originally an animal in the Deeproot Canopy, Thorian became corrupted and now stands as a towering abomination. Resistant to most elements, Thorian is particularly vulnerable to Holy damage.
Thorian Location
Find Thorian in the Cess Grounds within the Deeproot Canopy. Head right upon entering to encounter this formidable foe.
Thorian Fighting Strategy
Thorian boasts 2,600 HP (3,900 if Corrupted). Its passive negates consecutive attacks of the same type, healing 150% of damage dealt. Vary your attacks and leverage Holy damage for maximum effect. Below 50% health, Thorian unleashes a devastating attack, applying Plague, Curse, and Hexed with a 15-turn cooldown.
| Attacks | Energy Cost | Effect |
|---|---|---|
| Cursed Wave | 2 | Thorian attacks 3 party members, possibly inflicting Curse. |
| Overflowing Curse | 0 | Initiates a minigame; failure inflicts Plague. Cannot be dodged or blocked. |
| Cess Breath | 1 | Thorian sends a wave of rotten air, dealing AOE damage and debuffing the party. |
| Warped Crush | 1 | Thorian charges the party, damaging 3 members. |
| Blasphemous Obliteration | 5 | Below 50% health, Thorian devastates the party, applying Plague, Curse, and Hexed. Cannot be dodged or blocked. |
| Hexed Burst | 1 | Thorian sends an AOE wave, possibly applying Hexed or Curse. |
| Plague Rupture | 2 | Thorian applies a random debuff, then ruptures, dealing damage based on debuff count. |
Thorian Drops and Rewards
Defeating Thorian guarantees:
- Absolute Radiance
- Permafrost Curse
- Wild Impulse
- Heavenly Prayer
- Breath of Fungyir
- Stellian Core
- Metrom’s Amulet
- Darksigil
- Ring of Blight
- The Void Key (if Corrupted)
Possible drops include:
- Blightrock Dagger
- Blightwood Staff
- Memory Fragment
- Soul Dust
- Phoenix Tear
- Resplendant Essence
- Lineage Shard
- Skyward Totem
Metrom’s Vessel
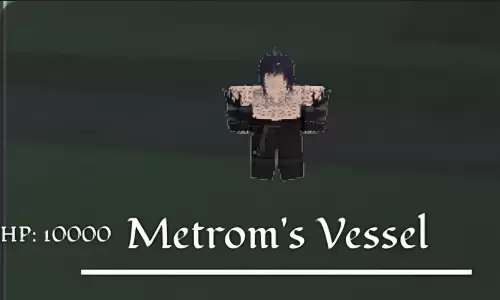
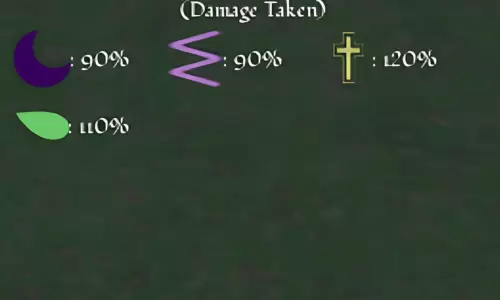

Once a hero, Metrom’s Vessel now serves as a host for Metrom, sealed in a Temporal Jail. This raid boss requires a Void Key, obtained from defeating corrupted versions of other bosses.
Metrom’s Vessel Location
As a Raid Boss, Metrom’s Vessel spawns on a global timer. Use your Void Key to join the fight when the server-wide notification appears.
Metrom’s Vessel Fighting Strategy
With 10,000 HP (15,000 if Corrupted), Metrom’s Vessel is a formidable statpile. Its first phase involves black wings that grant damage negation, which must be destroyed by applying status effects and debuffs. Timing is crucial to manage the transition to the second phase, where the wings switch between offensive and defensive modes. Additionally, Shadeblades are summoned, requiring quick elimination. The second phase introduces a Mini Shadebringer and intensified mechanics, demanding coordinated team efforts and constant debuff application.
Phase 1 Attacks:
| Attacks | Energy Cost | Effect |
|---|---|---|
| Rendering Slash | 0 | Metrom’s Vessel lunges, damaging and applying 3 Weakness stacks. |
| Deathbound | 1 | Metrom’s Vessel applies 3 stacks of Sundered to 2 random players. |
| Eclipse | 1 | Metrom’s Vessel buffs itself. |
| Invoke Shadeblades | 3 | Summons two Shadeblades with 200 HP each. Cannot be dodged or blocked. |
| Hexed Rend | 3 | An undodgeable AOE slash debuffing all players. Cannot be dodged or blocked. |
| Oblivion | 5 | Deals 50% of everyone’s HP and inflicts Curse. Cannot be dodged or blocked. |
Phase 2 Attacks:
| Attacks | Energy Cost | Effect |
|---|---|---|
| Oblivion + Eclipse | 1 | Combines Rendering Slash and Hexed Rend. |
| Unyielding Fury | 2 | Applies 3 stacks of Blind and 2 stacks of Hexed to all players. Cannot be dodged or blocked. |
| Minishade Bringer | 3 | Metrom’s Vessel shoots 3 Shadebringers. Cannot be dodged or blocked. |
| Shadebringer | 1 | Metrom’s Vessel slashes 3 Shadebringers, applying 4 stacks of Cursed to the party. Cannot be dodged or blocked. |
| Blackout | 2 | Debuffs the whole party. Cannot be dodged or blocked. |
Metrom’s Vessel Drops and Rewards
Defeating Metrom’s Vessel guarantees:
- Metrom’s Grasp
- Chaos Orb
- Expedite Anklet
- Echo Shard
- Tempurus Gem
- Arcanium Crystal
Possible drops include:
- Darkblood Staff
- Darkblood Dagger
- Darkblood Spear
- Darkblood Hexer
- Darkblood Sword
- Darkblood Cestus
Arkhaia and Seraphon
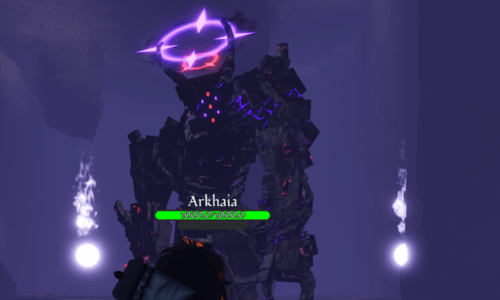
Arkhaia and Seraphon are rare and complex bosses not recommended for beginners. They require significant rank progression within their respective factions.
To unlock Arkhaia, reach rank 20 in the Cult of Thanasius. Arkhaia has 7000 HP and employs a damage-over-time mechanic. Defeating Arkhaia allows you to start a new character with the Inferion race.
To unlock Seraphon, reach rank 20 in the Church of Raphion. Seraphon has 4500 HP. Defeating Seraphon allows you to start a new character with the Sheea race.
For more insights on enhancing your gameplay, explore our Arcane Lineage Class tier list and guide.
This guide provides a detailed overview of the bosses in Arcane Lineage, helping you strategize and prepare for each encounter. Whether you're facing the relatively easier King Slime or the daunting Metrom’s Vessel, understanding their mechanics and rewards is crucial for success.
Latest News
more >-

-

- GTA 6 May Feature Cameo by DJ Khaled
- Apr 03,2026
-

-
-

