Subtle aspects in Overwatch 2: expand the boundaries and change the nickname
- By Eric
- Mar 06,2025
Update Your Overwatch 2 Username: A Comprehensive Guide
Your Overwatch 2 in-game name is more than just a nickname; it's your digital identity. But what happens when you want a change? This guide provides a step-by-step walkthrough for updating your BattleTag or in-game name across PC and console platforms.
Key Considerations:
- Free Name Change: You get one free BattleTag change.
- Paid Name Changes: Subsequent changes incur a fee (approximately $10 USD; check your region's pricing in the Battle.net Shop).
- Cross-Platform Play: If enabled, your BattleTag (changed via Battle.net) will be displayed across all platforms. If disabled, your console gamertag will be shown to other players on that console.
How to Change Your Name:
The method depends on your platform and cross-platform play settings.
Method 1: PC (or Console with Cross-Platform Play Enabled)
This method uses your Battle.net account.
-
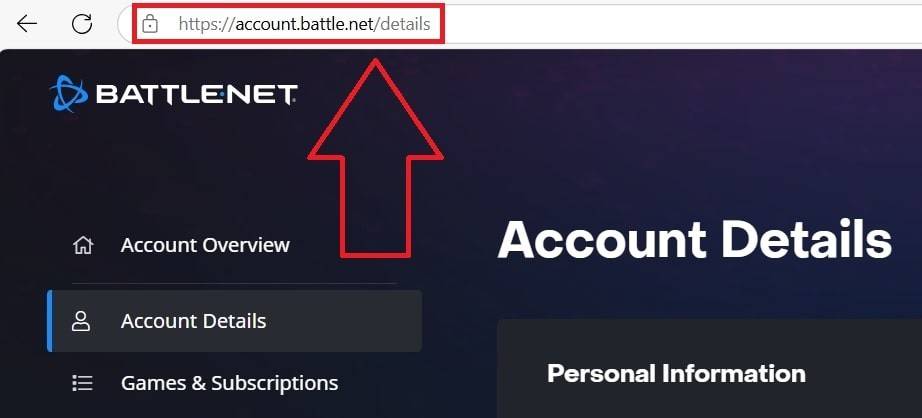
Log in: Access the official Battle.net website and log into your account.
-
Account Settings: Click your current username (top-right). Select "Account Settings."

-
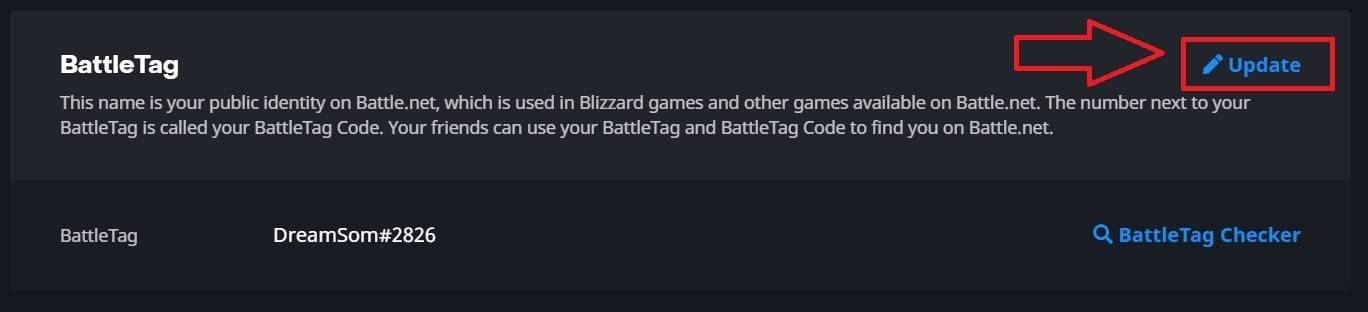
Update BattleTag: Locate your BattleTag. Click the blue pencil icon ("Update").
-
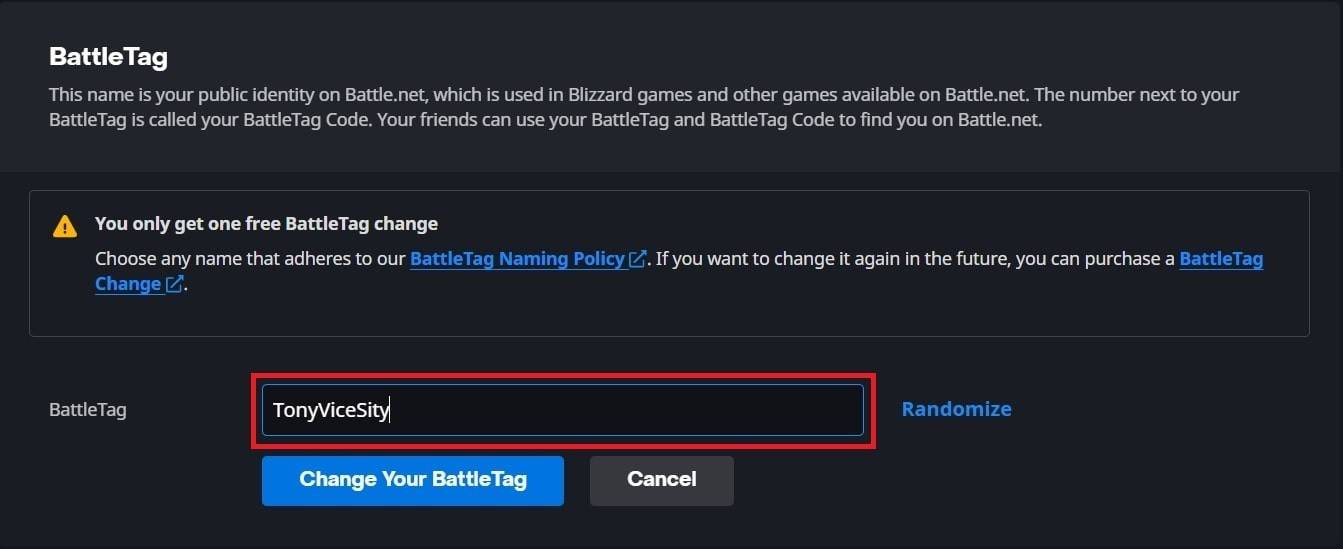
Enter New Name: Input your desired name, adhering to Blizzard's naming policies.
-
Confirm Change: Click "Change Your BattleTag."
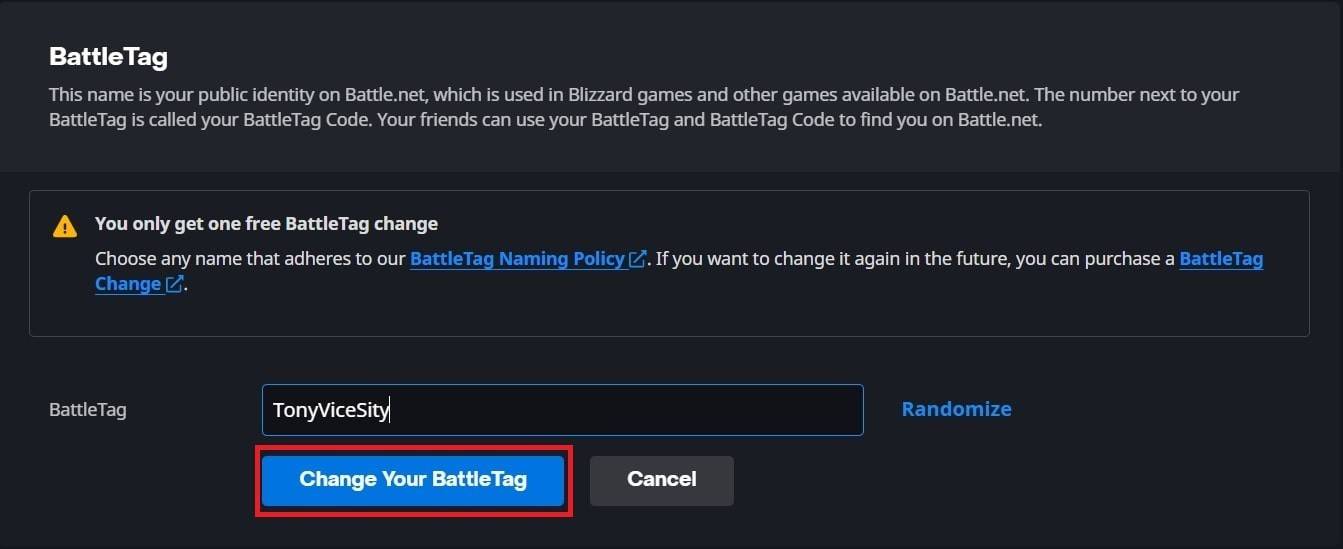
Note: Changes may take up to 24 hours to reflect in-game.
Method 2: Xbox (Cross-Platform Play Disabled)
This method uses your Xbox Gamertag.
-
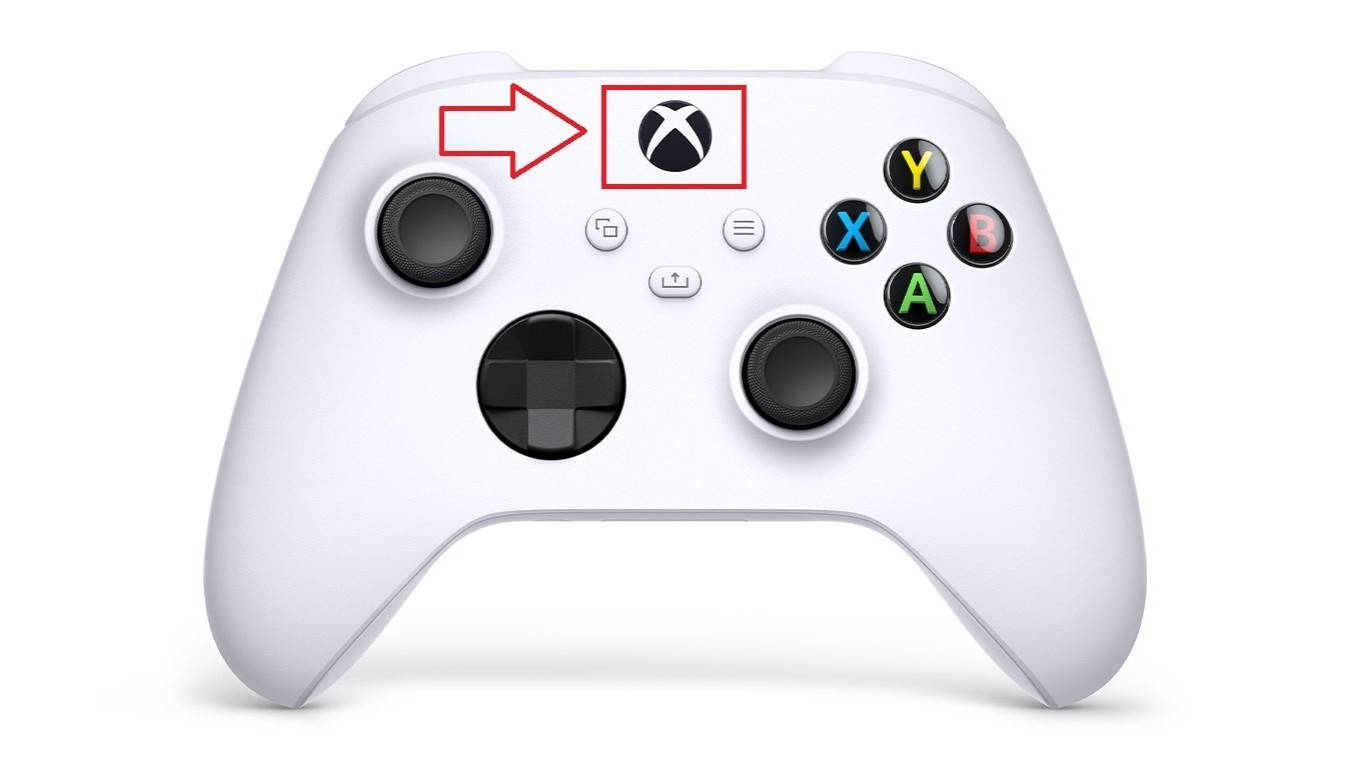
Xbox Menu: Press the Xbox button. Navigate to "Profile & System," then your profile.
-
Customize Profile: Select "My Profile," then "Customize Profile."

-
Change Gamertag: Click your Gamertag, enter your new name, and follow the prompts.

Note: This change only affects Xbox players without cross-platform play enabled.
Method 3: PlayStation (Cross-Platform Play Disabled)
This method uses your PSN ID.
-
Console Settings: Access "Settings," then "Users and Accounts," then "Accounts," and finally "Profile."

-
Change Online ID: Find "Online ID" and select "Change Online ID." Enter and confirm your new name.
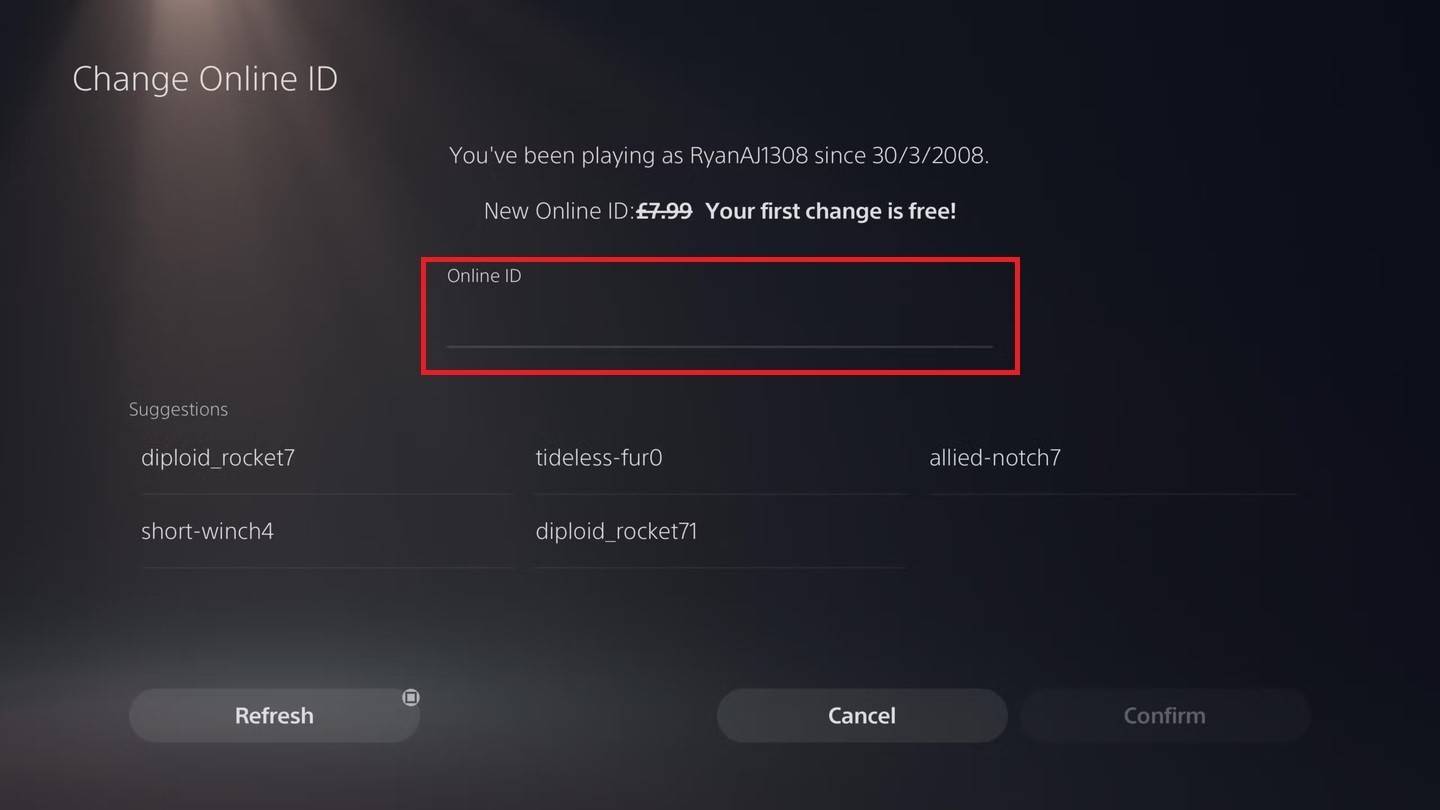
Note: This change only affects PlayStation players without cross-platform play enabled.
Final Thoughts:
Before changing your name, carefully consider your platform's settings and the implications for visibility across different platforms. Remember your free name change, and be prepared for any associated fees for future changes. Choose wisely, and enjoy your new Overwatch 2 identity!
Latest News
more >-

- Chibi Go's Global Debut: Android Pre-Reg Starts
- Apr 15,2026
-
-

-

-

- GTA 6 May Feature Cameo by DJ Khaled
- Apr 03,2026