"How to Play Sega Game Gear Games on Steam Deck"
- By Christian
- May 22,2025
Quick Links
The Sega Game Gear was a pioneering handheld console from the early 90s, designed to rival Nintendo's Game Boy. With its vibrant full-color display and innovative features, it stood out in the market. The Game Gear boasted a cartridge expansion for playing Sega Master System games, a TV tuner for turning it into a portable television, and a rich library of games. While it didn't achieve the longevity of its competitor, fans can relive the magic on the Steam Deck through EmuDeck. This guide will walk you through the process of installing EmuDeck and enjoying Game Gear games on your Steam Deck.
Updated January 8th, 2025, by Michael Llewellyn: The Sega Game Gear's design shares similarities with the Steam Deck, making it an ideal candidate for emulation on Valve's handheld PC. To optimize performance, EmuDeck developers recommend installing Power Tools via Decky Loader. This guide covers the steps for setting up Decky Loader, installing the Power Tools plugin, and ensuring compatibility after Steam Deck updates.
Before Installing The EmuDeck
 Before diving into the world of retro gaming with EmuDeck, it's essential to prepare your Steam Deck and gather the necessary tools.
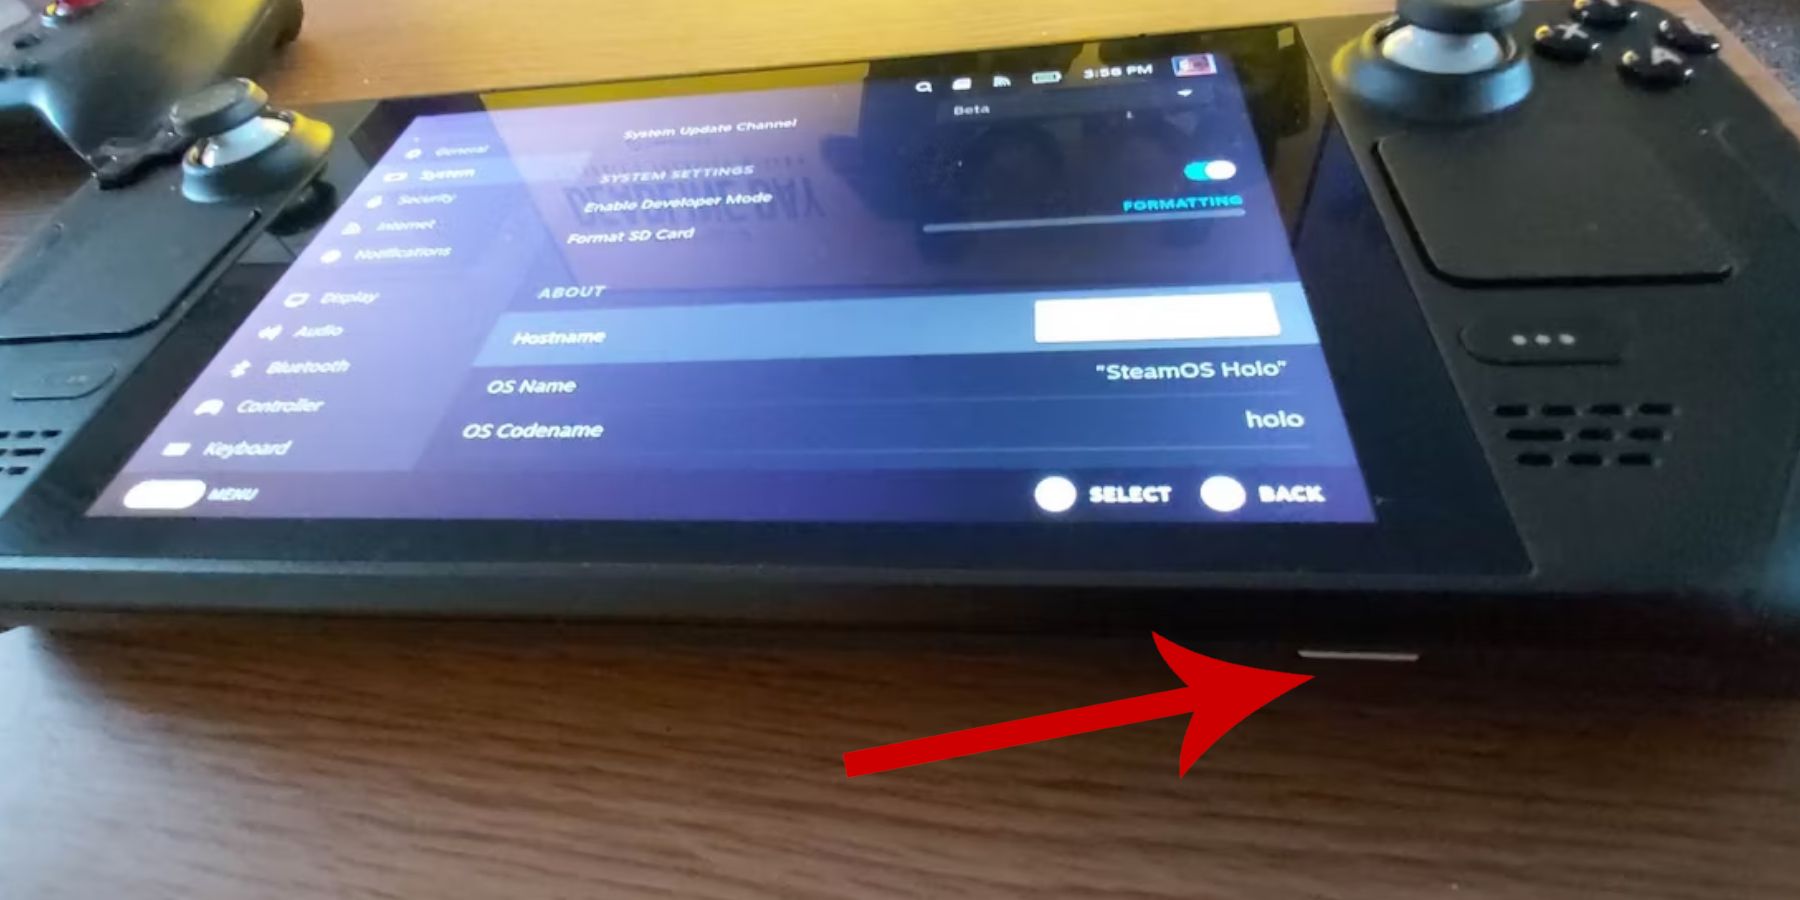
Activate Developer Mode
- Press the Steam button.
- Navigate to the System menu.
- Under System Settings, enable Developer Mode.
- A new Developer menu will appear.

- In the Developer menu, find Miscellaneous.
- Enable CEF Remote Debugging.
- Press the Steam Button again.
- Go to the Power menu and restart the Steam Deck.
Recommended Items
- An external storage solution is crucial for installing emulators and ROMs. An A2 MicroSD card is ideal for storing games and emulators, freeing up your internal SSD for Steam games and apps.
- Alternatively, use an external HDD, but remember you'll need a Steam Deck Dock to connect it.
- A keyboard and mouse can simplify file transfers and game searches.
- Ensure you have legally obtained Game Gear ROMs, which you can create from games you own.
Install EmuDeck On The Steam Deck
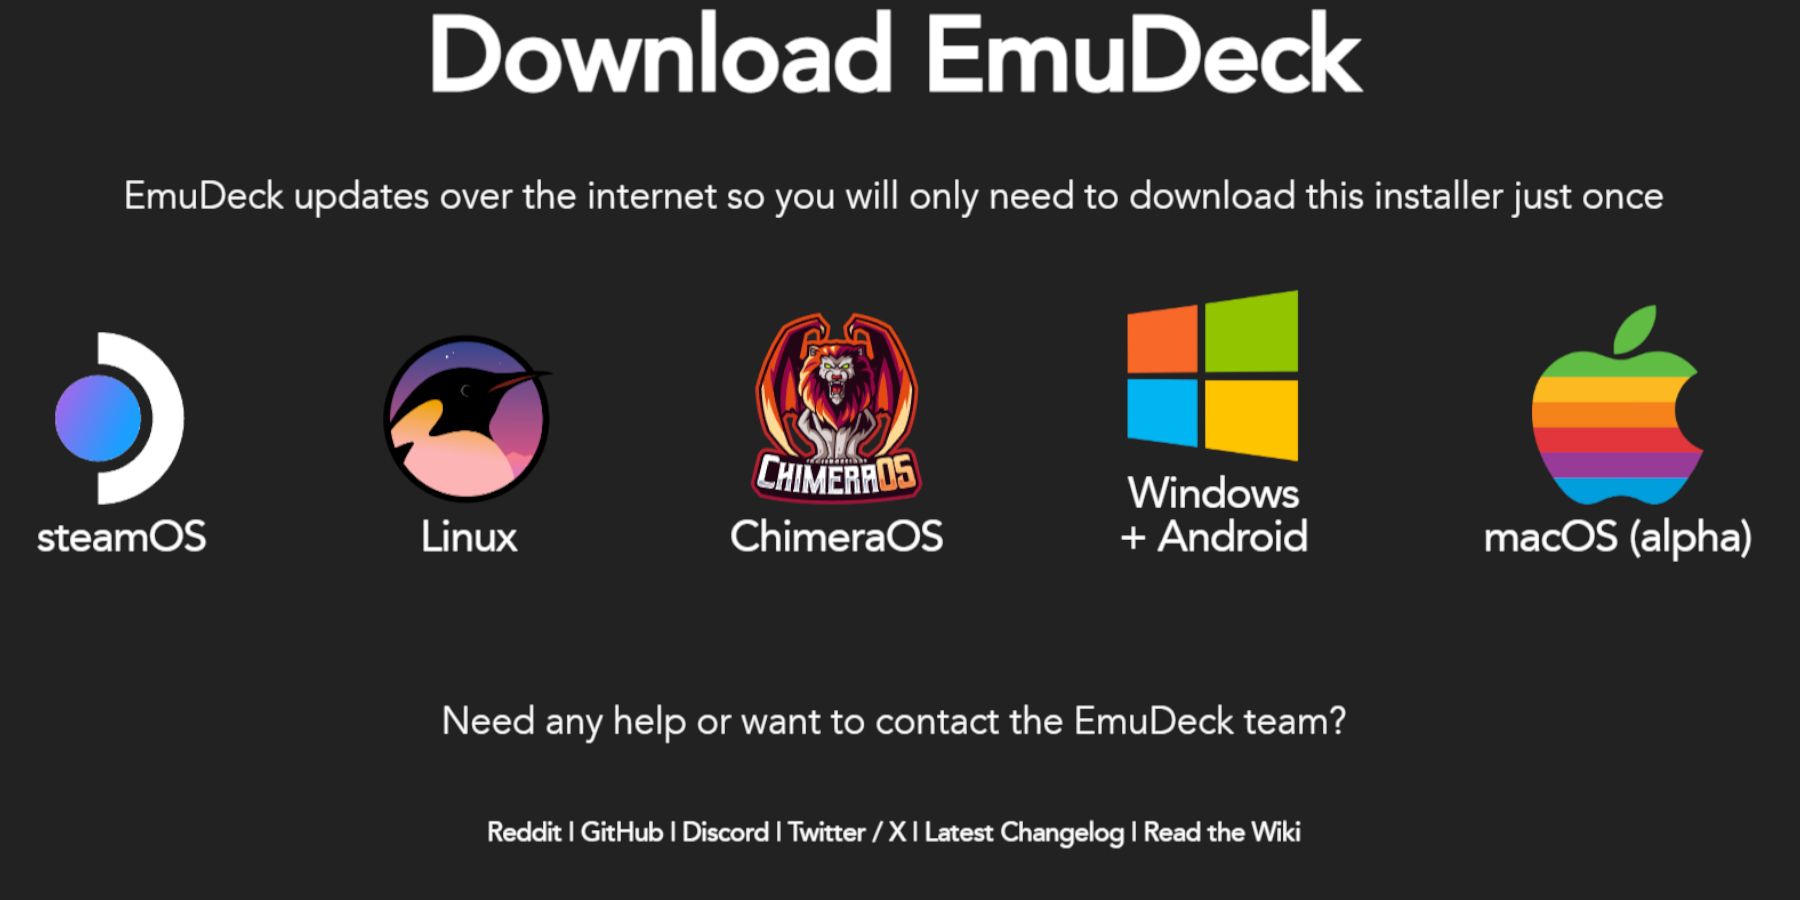 Once your Steam Deck is set up for emulators, you can proceed to install EmuDeck.
- Press the Steam Button.
- Access the Power menu and choose Switch to Desktop.
- Open your preferred browser.
- Visit the EmuDeck website and click Download to get the program.
- Select the Steam OS version and opt for Custom Install.
- On the EmuDeck installation screen, choose the SD Card image labeled Primary.
- You can install all emulators or select RetroArch, Emulation Station, and Steam Rom Manager, then click Continue.
- Enable Auto Save.
- Skip through the next screens and select Finish to complete the installation.
Quick Settings
- Launch the EmuDeck program and navigate to Quick Settings in the left menu.
- Ensure AutoSave is enabled.
- Activate Controller Layout Match.
- Set Sega Classic AR to 4:3.
- Turn on LCD Handhelds.
Transferring Game Gear ROMS And Steam ROM Manager
 Now, transfer your Game Gear ROMs to the correct folder and integrate them into your Steam Deck's library for Gaming Mode access.
Transfer ROMS
- In Desktop Mode, open the Dolphin File Manager.
- Navigate to Primary under Removable Devices.
- Open the Emulation folder.
- Select ROMs and then the gamegear folder.
- Transfer your ROMs into this folder.
Steam ROM Manager
- Reopen the EmuDeck program.
- Access the Steam ROM Manager from the left menu.
- Click Yes to close the Steam Client.
- Click Next on the Welcome to SRM! page.
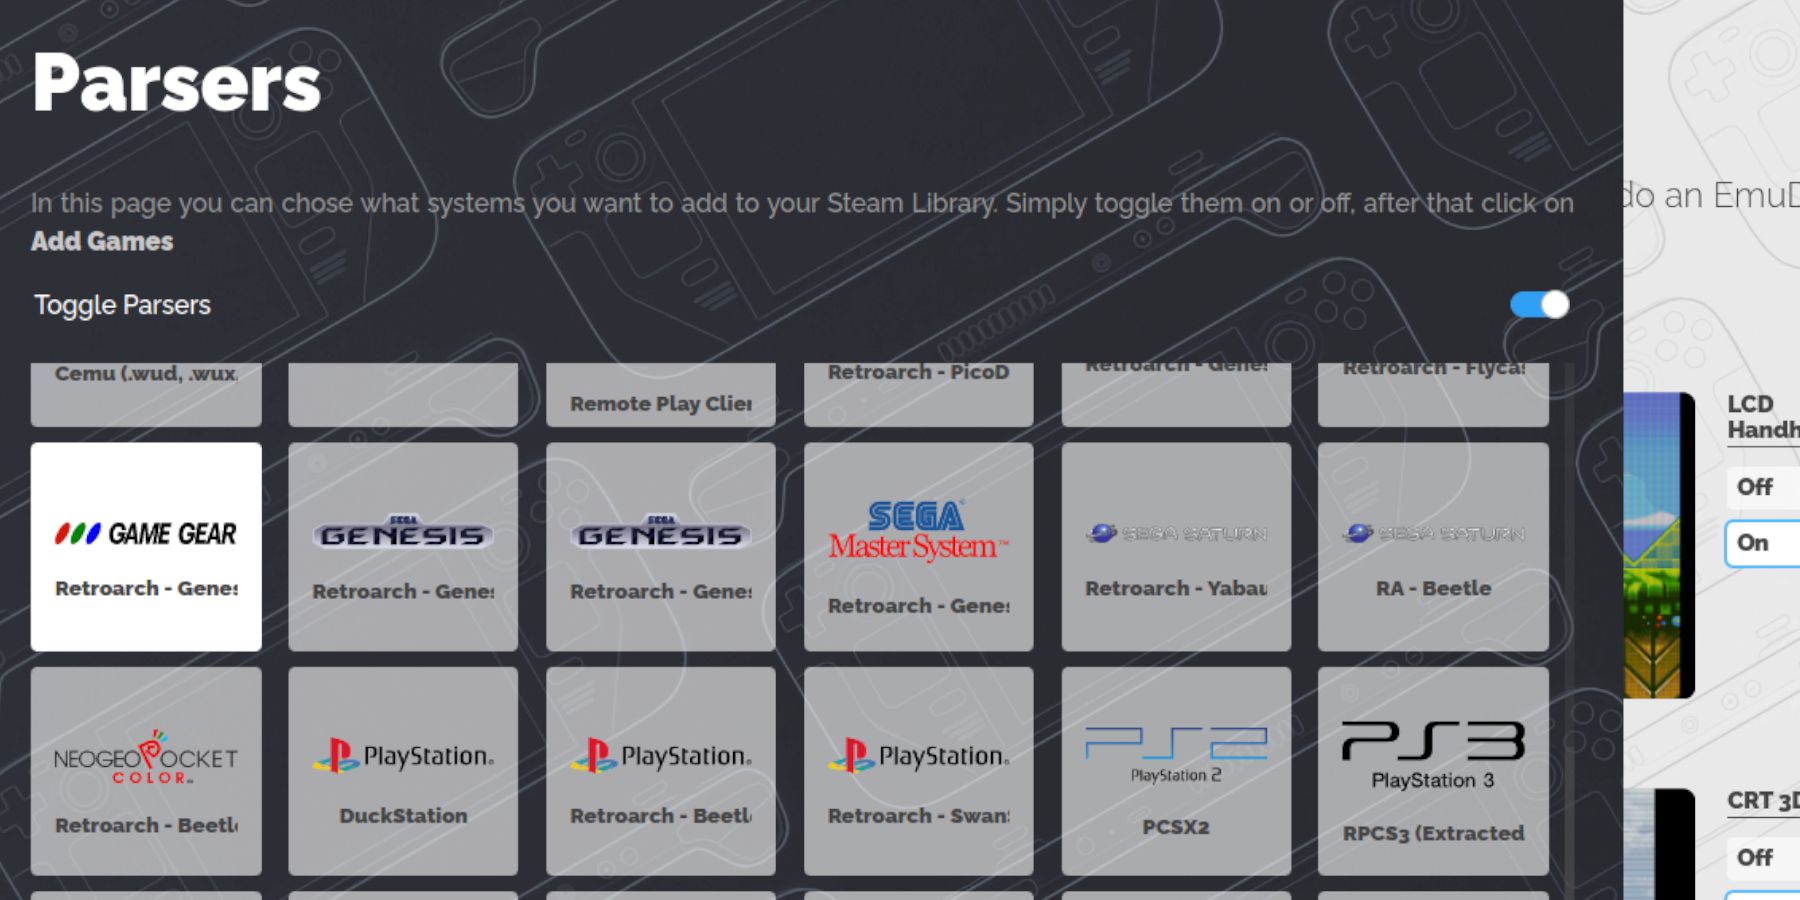
- On the Parsers screen, select the Game Gear icon.
- Choose Add Games.
- Then click Parse on the Add your games to Steam page.
- Verify the artwork and covers, then select Save to Steam.
Fix Missing Artwork On EmuDeck
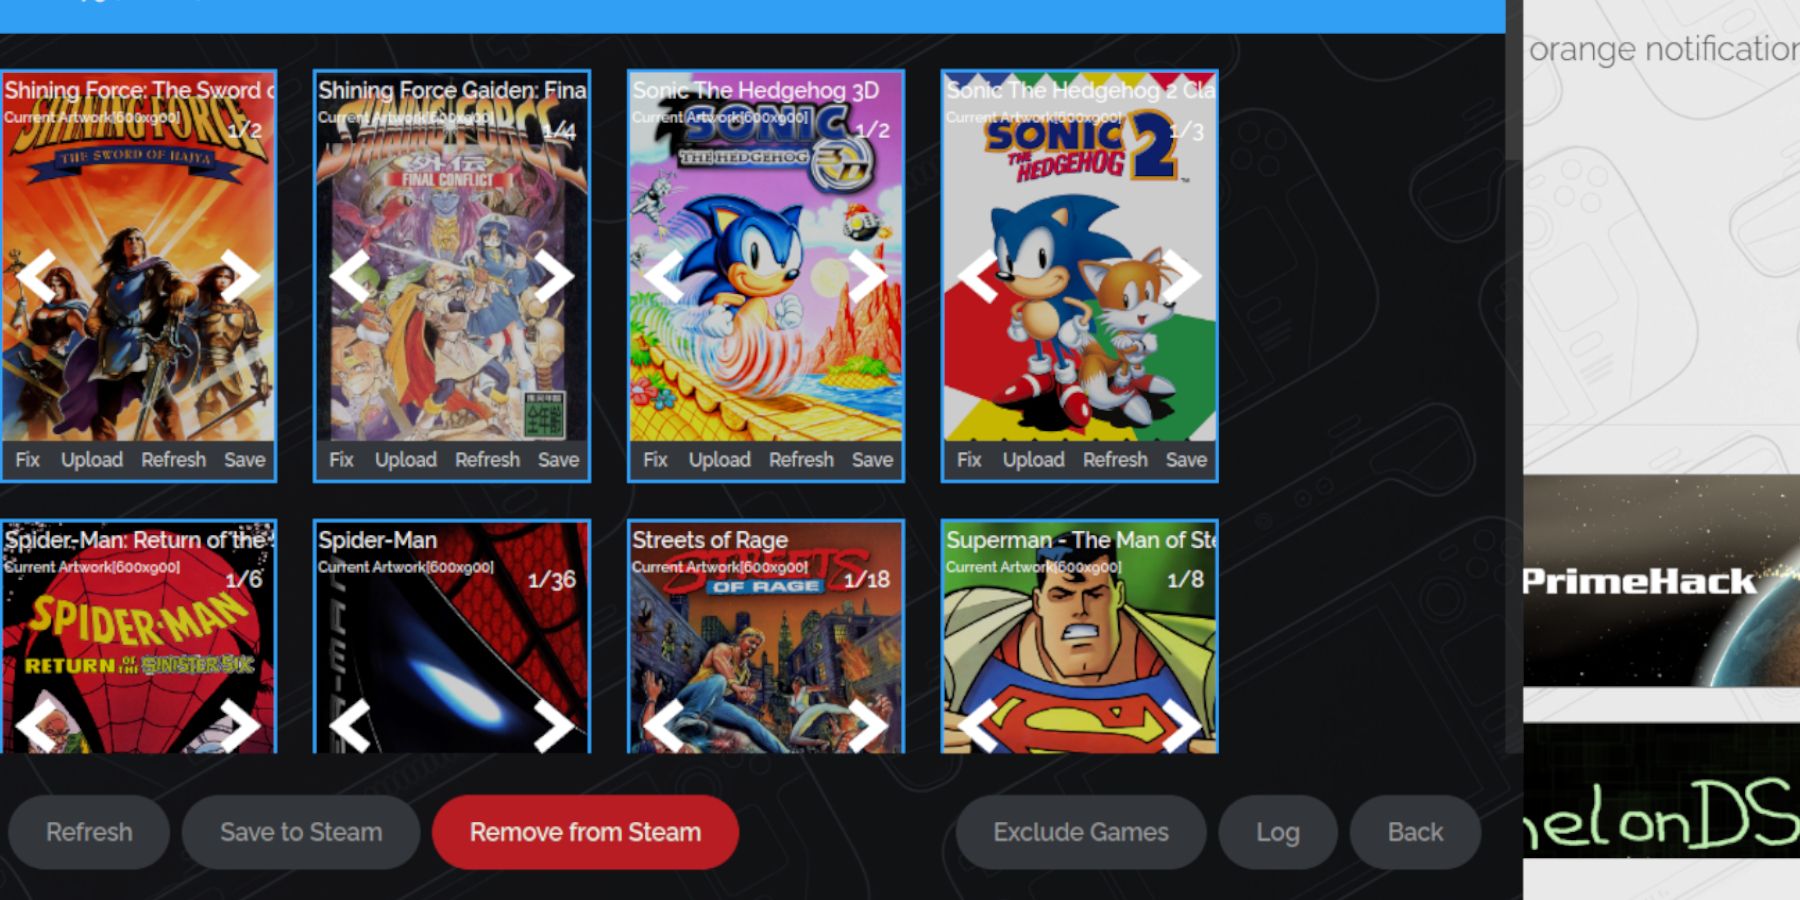 Sometimes, the Steam ROM Manager may struggle to find the correct cover art for your Game Gear games. Here's how to fix missing or incorrect artwork.
- If the artwork is incorrect or missing, click Fix.
- Enter the game's title in the fix Artwork and Title search bar.
- The engine should offer various game covers to choose from.
- Select the desired image, then click Save and Close, followed by Save to Steam.
Check if the ROM filename includes numbers before the title, as this can cause the Steam ROM Manager to fail in detecting the correct artwork. Right-click the ROM, select Rename, and remove any leading numbers.
Upload Missing Artwork
- Switch to Desktop Mode.
- Use a browser to search for the missing game cover.
- Save the cover to the Pictures folder on your Steam Deck.
- Reopen the EmuDeck program.
- Launch the Steam Rom Manager.
- Click Upload on the game's frame.
- Navigate to the Pictures folder and select the new cover image.
- Click Save and Close, then Save to Steam.
Playing Game Gear Games On The Steam Deck
Now, it's time to play your Game Gear games in the Steam Deck's Gaming Mode and fine-tune the settings for optimal performance.
- Switch back to Gaming Mode from the desktop background.
- Press the Steam button.
- Go to the Library menu.
- Press the R1 button to access the Collections tab.
- Open the Game Gear section.
- Select your game and choose Play.
Performance Settings
By default, the Steam Deck may set Game Gear games to 30 FPS, which can lead to slowdowns and audio issues. Adjust the framerate with these steps:
- Press the QAS button, located under the right trackpad.
- Select Performance.
- Under Performance Settings, enable Use per-game profile.
- Increase the Frame Limit to 60 FPS.
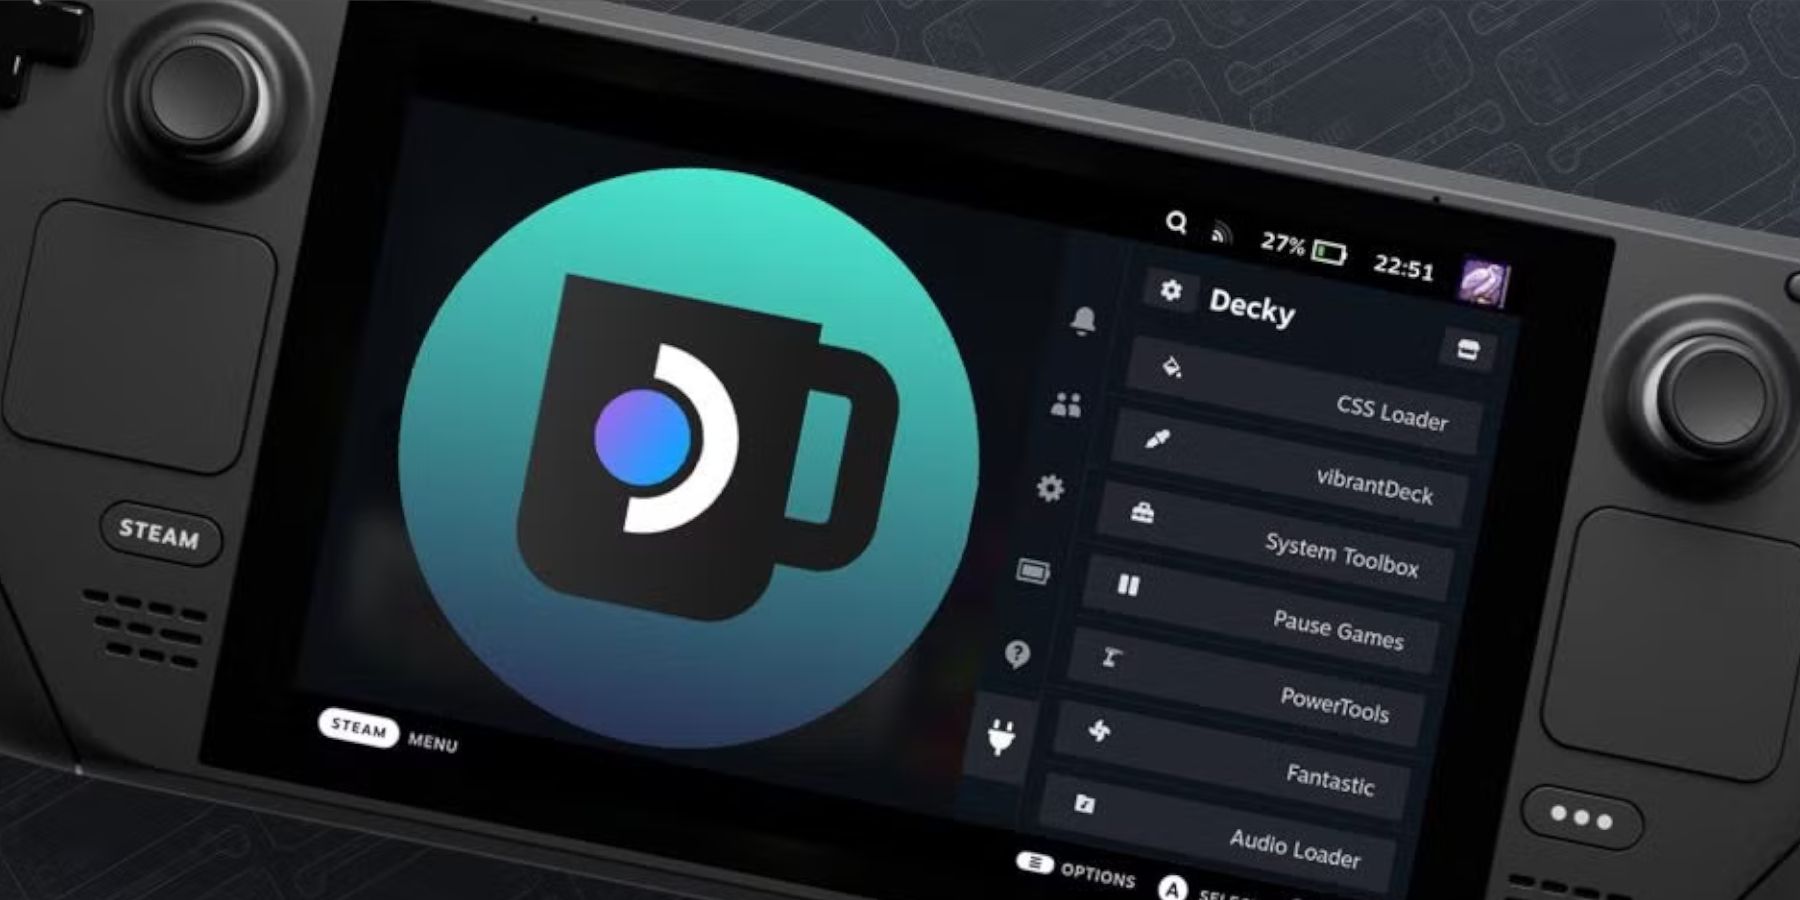
Install Decky Loader For The Steam Deck
 To further enhance the performance of Sega games, install Power Tools through Decky Loader. Follow these steps:
- Optionally, connect a keyboard and mouse for easier navigation. Otherwise, press the Steam button and X to access the onscreen keyboard and use the trackpads as a mouse.
- Ensure the Steam Deck is in Desktop Mode by pressing the Steam button, accessing the Power menu, and selecting Switch to Desktop Mode.
- Open a browser and go to the GitHub Decky Loader page.
- Click the large Download icon to start the download.
- After the download completes, double-click the launcher and choose Recommended Install.
- Restart the Steam Deck in Gaming Mode.
Install The Power Tools Plugin
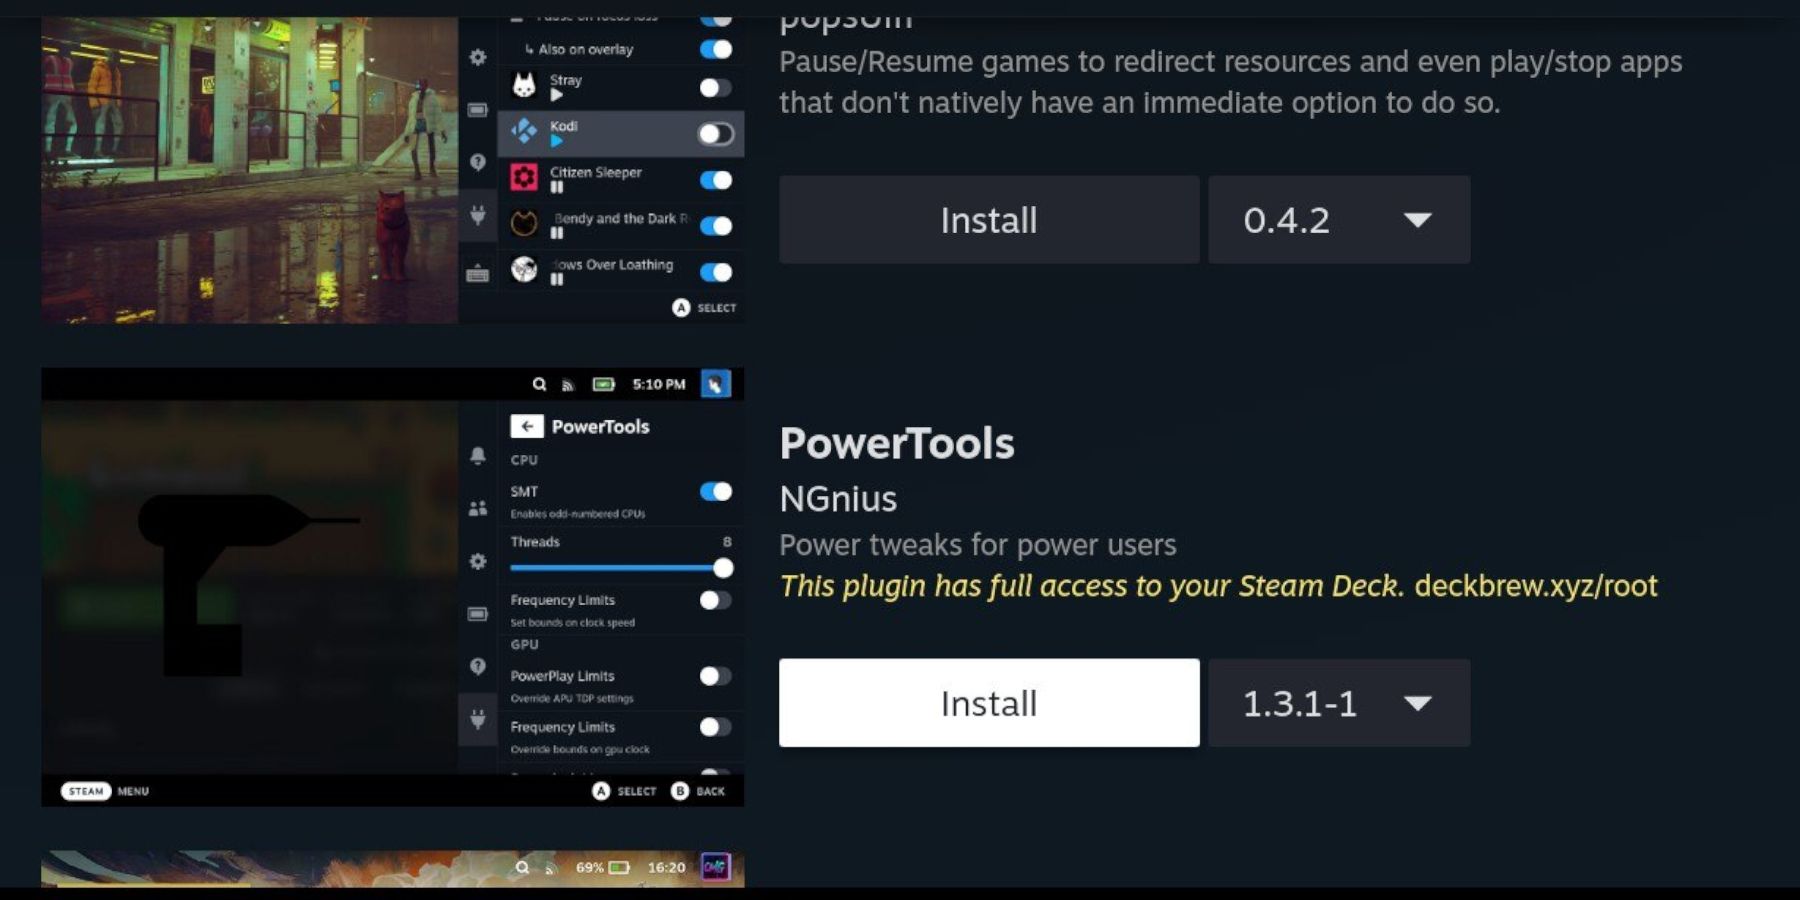 With Decky Loader installed, you can now add the Power Tools plugin to optimize your gaming experience.
- In Gaming Mode, press the Quick Access Menu (QAM) button, located below the right trackpad.
- Click the new plugin icon at the bottom of the right-side menu.
- Open the store icon at the top of the Decky Loader menu.
- In the Decky Store, locate and install the Power Tools plugin.
Settings For Power Tools In Emulated Games
- Press the Steam button.
- Navigate to Library and open the Collections tab to find your Sega Game Gear game.
- Press the QAM button, then select Decky Loader, and access the Power Tools menu.
- Disable SMTs.
- Set the number of Threads to 4.
- Press the QAM button again, then open the Performance menu via the small battery icon.
- Enable Advance View.
- Turn on Manual GPU Clock Control.
- Increase the GPU Clock Frequency to 1200.
- Finally, enable Per Game Profile to save these settings for individual games.
Fixing Decky Loader After A Steam Deck Update
 Major Steam Deck updates might remove Decky Loader from your Quick Access Menu, but you can restore it with your settings intact using these steps:
- Switch to Desktop Mode from the Power menu.
- Open a browser after the Steam Deck restarts in Desktop Mode.
- Visit the Decky Loader GitHub page and click the Download icon.
- Choose Execute; do not select Open, as Open will reset your install and erase your settings.
- Enter your sudo password when prompted. If you haven't set one, follow the on-screen instructions to create a new one. Choose a memorable password and note it for future use.
- Once the installation is complete, power off the Steam Deck and restart it in Gaming Mode.
- Press the QAM button to access the restored Decky Loader app with all your previous settings.
With these steps, you're all set to enjoy and optimize your Game Gear gaming experience on the Steam Deck.
 Rate NowYour comment has not been saved
Latest News
more >-

- Mecha Arena's 4th Anniversary: Free Mech for All
- May 17,2026
-

- Cooking Diary Debuts Retro Outfits and Storyline
- May 16,2026
-

- Echocalypse Tips to Fortify Your Case
- May 16,2026
-

- Vampire Survivors Expands to Tabletop
- May 14,2026
-